
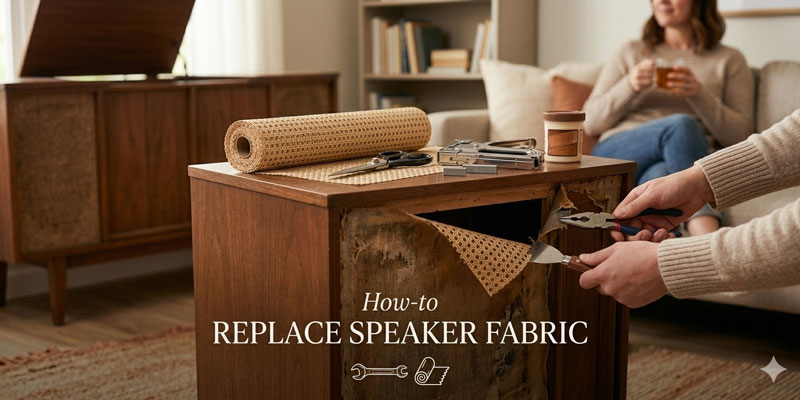
Is the speaker fabric on your vintage console table looking worn, stained, or simply outdated? Replacing that old speaker cloth can instantly refresh the look of your cherished piece and bring new life to its sound quality.
This is a tricky job best left to experts, but with the right steps and a little patience, you can do it yourself. In this guide, you’ll learn exactly how to remove the old fabric and install fresh speaker cloth that fits perfectly and looks great.
Ready to restore your vintage console table and impress everyone with your DIY skills? Let’s get started!
Removing Old Speaker Fabric
Removing old speaker fabric from a vintage console table is the first step in restoring its sound and look. This process takes care and patience to avoid damaging the grill frame. Proper removal also helps prepare the surface for new fabric, ensuring a smooth finish.
Detaching The Grill Frame
Start by gently removing the grill frame from the console table. Use a flat tool, such as a screwdriver, to pry it loose carefully. Work slowly around the edges to avoid cracking or bending the frame. Place the frame on a clean surface to keep it safe during the next steps.
Removing Staples And Residue
Old speaker fabric often stays attached with staples. Use pliers or a staple remover to pull out each staple. Take care not to tear the frame or leave holes. After removing the staples, gently peel the fabric off. Use a scraper or a brush to remove any leftover glue or residue from the frame.
Cleaning The Frame
Clean the grill frame to remove dust, dirt, and old adhesive. Use a soft cloth with mild soap and water to wipe the surface. Avoid soaking the frame, especially if it is wood. Let the frame dry completely before adding new speaker fabric. A clean frame helps the new fabric stick better and look neat.
Choosing Replacement Fabric
Choosing the right replacement fabric for your vintage console table’s speaker is important. The fabric affects sound quality and the look of the piece. The goal is to find fabric that fits the style and complements the speaker. This section breaks down the types of fabrics, what to look for in materials, and where to find good fabric options.
Types Of Speaker Fabrics
Speaker fabrics come in many types. Common options include polyester blends, cotton, and linen. Polyester blends are popular because they are strong and allow sound to pass through easily. Cotton and linen provide a more natural look but may not be as durable. Some fabrics have a tight weave, while others are more open. Choose a fabric that balances durability with sound transparency.
Material Properties To Consider
Sound transparency is the most important property. The fabric must let sound pass without distortion. Avoid thick or heavy fabrics that block sound. Durability is also key. The fabric should resist tearing and fading over time. Light-coloured fabrics can brighten the console’s look. Stretchy fabrics make installation easier and help keep a tight fit.
Where To Buy Quality Fabric
Look for fabric at stores specialising in audio or upholstery materials. Online shops often have speaker cloth designed specifically for this use. Check customer reviews to ensure quality. Local fabric stores may also carry suitable options. Ask for samples if possible. This helps check texture and transparency before buying.
Installing New Speaker Fabric
Installing new speaker fabric is a key step in restoring your vintage console table’s charm and sound quality. This process requires careful measuring, cutting, and securing of the fabric to ensure a neat finish. A well-installed fabric not only protects the speaker but also enhances the table’s vintage look.
Cutting Fabric To Size
Begin by measuring the speaker frame accurately. Add about two inches to each side for folding and securing. Use sharp scissors to cut the fabric cleanly along the marked lines. Cutting carefully prevents frayed edges and ensures the fabric fits perfectly.
Securing Fabric Tightly
Place the fabric over the speaker frame. Pull it taut to avoid wrinkles or sagging. Use a staple gun or small nails to secure the fabric firmly to the back of the frame. Work slowly from the centre outwards to keep the tension even.
Reassembling The Console Table
Once the fabric is secure, align the speaker frame back into the console table. Make sure it fits snugly, with no gaps. Reattach any screws or clips that held the frame in place. Your vintage console table is now ready to impress with a fresh new look.
FAQs for How to Replace Speaker Fabric in a Vintage Console Table?
How To Remove Speaker Cloth from the Frame?
Remove the speaker cloth by gently pulling it from the edges of the frame. Use a flat tool to carefully lift staples or glue. Avoid tearing the frame—clean residue before applying new fabric.
What Fabric To Use For Speaker Covers?
Use polyester blend fabric for speaker covers. It offers durability, good acoustic transparency, and a clean, professional appearance.
How To Apply Speaker Mesh?
Start by stretching the speaker mesh over the frame’s longest side. Press firmly to secure it. Pull the fabric tight, then press and attach the opposite side. Repeat for all edges to ensure a snug, wrinkle-free fit. Trim excess fabric for a clean finish.
Conclusion
Replacing the speaker fabric in a vintage console table is a simple way to refresh its look. Choose the right fabric and take your time with each step. Keep the fabric tight and secure for the best finish. Small efforts bring big changes to your vintage piece.
Enjoy the new life you gave your console table with this easy upgrade.