
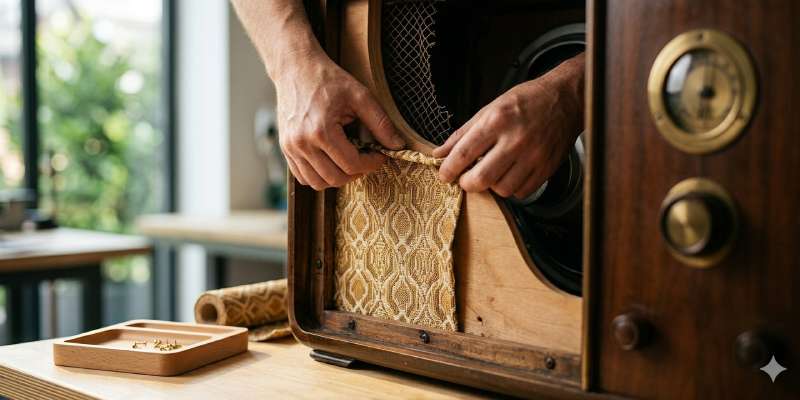
If you own a vintage floor model radio, you know how much charm and character it adds to your space. But over time, the speaker cloth that protects the delicate speakers often wears out or gets damaged.
Replacing it might seem tricky, but with the right approach, you can bring your radio back to life and preserve its classic look. In this guide, you’ll learn simple, step-by-step methods to install new speaker cloth on your vintage radio.
By following these tips, you’ll not only improve the sound quality but also restore your radio’s authentic appearance—making it a centerpiece you’ll be proud to show off. Ready to give your radio a fresh, clean look? Let’s dive in!
Preparing The Radio And Cloth
Preparing the radio and speaker cloth sets the stage for a successful installation. This step requires care and attention to detail. It ensures the new cloth fits well and looks great on your vintage floor model radio. Begin by removing any old cloth and cleaning the frame thoroughly. Select the right material that matches the radio’s style and sound needs. Finally, cut the cloth precisely to size for a neat finish.
Removing Old Cloth And Cleaning Frame
Start by carefully removing the old speaker cloth. Use a flat tool to lift the edges without damaging the frame. Pull gently to avoid tearing the wood or metal parts. After removing the cloth, clean the frame with a soft brush or cloth. Remove dust, dirt, and glue residue. A clean frame helps the new cloth stick better and look smooth.
Choosing The Right Speaker Cloth Material
Pick a speaker cloth that fits the radio’s age and style. Look for materials like polyester or cotton blends, which allow sound to pass easily. Avoid thick or heavy fabrics that block sound. Choose colors and patterns that match the original design or your personal taste. The right cloth improves sound quality and keeps the vintage look intact.
Cutting Cloth To Size
Lay the new speaker cloth flat on a clean surface. Measure the frame carefully and mark the cloth with a pencil or tailor’s chalk. Leave a small extra margin for folding or stretching. Use sharp scissors to cut the cloth cleanly. A precise cut prevents wrinkles and loose edges during installation. Double-check the size before attaching it to the radio.
Attaching The Speaker Cloth
Attaching the speaker cloth to a vintage floor model radio is a careful task. This step ensures the cloth fits well and looks neat. Proper attachment protects the speaker and keeps the radio’s classic look.
Follow clear steps to position, stretch, and secure the cloth. Choose the right adhesive and seal the edges tightly. These actions help the cloth stay in place for years.
Positioning And Stretching The Cloth
Place the speaker cloth over the frame with the front side facing out. Align it evenly to cover the entire speaker area. Start from the longest side to get the best fit.
Gently pull the cloth to remove wrinkles. Stretch it evenly but avoid overstretching. This keeps the cloth tight and prevents sagging.
Applying Adhesive Methods
Use glue suitable for fabric and wood surfaces. Apply a thin, even layer on the frame edges. Avoid using too much adhesive to prevent seepage.
Press the cloth onto the glued frame quickly. Hold it firmly for a few minutes. This helps the glue bond well with the cloth and frame.
Securing Edges For A Tight Fit
Fold the cloth edges neatly around the frame. Secure the back with staples or small tacks if the frame allows. Ensure the cloth stays tight without loose spots.
Trim any excess fabric carefully. Double-check the fit to avoid wrinkles. A tight fit gives the radio a clean and polished look.
Finishing Touches
Finishing the installation of speaker cloth on vintage floor model radios requires careful attention. This final step ensures a neat look and maintains sound quality. It also helps protect the speaker from dust and damage. Follow these tips for a perfect finish that lasts.
Trimming Excess Fabric
After securing the speaker cloth, trim any extra fabric carefully. Use sharp scissors for clean cuts. Avoid cutting too close to the frame to prevent fraying. Leave a small margin to keep the cloth tight and secure. This step improves the radio’s appearance and prevents loose edges.
Ensuring Proper Sound Transmission
Make sure the fabric does not block the speaker holes. The cloth should be tight but not pressed too hard against the speaker. This balance allows sound to pass clearly. Choose a speaker cloth with good acoustic transparency for the best results. Test the sound after installation to confirm clarity.
Maintenance Tips For Longevity
Keep the speaker cloth clean to maintain its look and function. Dust it gently with a soft brush or vacuum on low. Avoid using water or harsh cleaners that may damage the fabric. Inspect the cloth regularly for tears or loose spots. Replace it promptly to protect your vintage radio’s speaker.
FAQs: How to Install Speaker Cloth in Vintage Floor Model Radios?
How To Apply Speaker Mesh?
Start by placing the speaker mesh on the longest side and pressing firmly. Pull the fabric tight to avoid sagging. Press and secure the opposite side next. Ensure the mesh stays taut and evenly stretched for a clean fit. Use adhesive if needed for extra hold.
What Are Common Problems With Antique Radios?
Common problems with antique radios include weak or no sound, humming or buzzing noises, overheating, distorted audio, and physical damage to components.
Does Grill Cloth Affect Sound?
Grill cloth minimally affects sound by slightly diffusing and reflecting audio waves. It mainly protects speakers without significant sound loss.
Conclusion
Installing speaker cloth in vintage floor model radios is a simple way to restore their look and function. Take your time to measure and cut the cloth carefully. Use the right glue to keep the fabric tight and secure. Press firmly and check for wrinkles or loose spots.
Clean work results in better sound quality and a neat finish. Enjoy bringing new life to your vintage radio with this easy upgrade. Your patience and care make all the difference.